Introduction
This post explains how to add user authentication to a SvelteKit application from scratch, without using any authentication libraries. Users can register with their email, name and password, and they can log in with their email and password. Certain pages are protected from non-authenticated users. Check out the demo.
To authenticate users, we generate JWTs (JSON web tokens) and save these as HTTP-only cookies. The users are stored in a MongoDB Atlas database, but you can take any database, for that matter.
The procedure is basically the same as for Express apps (explained for example in Build A Node.js API Authentication With JWT Tutorial by Dev Ed), but with SvelteKit it is even a bit easier.
The code of this post can be found on GitHub. I also published a tutorial on my YouTube channel (in German).
Setup
We start with a basic SvelteKit application with the following page structure. The code can be found in the branch starter-code of the mentioned repository.
-- routes/
---- account/
------ +page.svelte
---- dashboard/
------ +page.svelte
---- login/
------ +page.svelte
---- register/
------ +page.svelte
-- +layout.svelte
-- +page.svelte
We also have a navigation component lib/components/Nav.svelte embedded into our layout with links to our pages, /, /dashboard, /account, /register, /login. We cover that component later.
The page /register has a simple form with email, password, and name.
<!-- /register/+page.svelte -->

<form method="POST" autocomplete="off">
	<div>
		<label for="email_input">Email</label>
		<input type="email" id="email_input" name="email" />
	</div>
	<div>
		<label for="password_input">Password</label>
		<input type="password" id="password_input" name="password" />
	</div>
	<div>
		<label for="name_input">Name</label>
		<input type="text" id="name_input" name="name" />
	</div>
	<button>Register</button>
</form>
The login page has a very similar form, just without the name field. The dashboard page has some dummy data. Right now, the dashboard is accessible to anyone, and our goal is to restrict it to authenticated users. The same goes for the account page.
MongoDB
We will store our users in a MongoDB database. We will use MongoDB Atlas, which is their cloud-based solution.
Open your MongoDB dashboard and create a cluster (if you are unsure how that works, check out their tutorial). By clicking "Connect", you will get a URI of the form
mongodb+srv://{USER_NAME}:{USER_PASSWORD}@{CLUSTER_NAME}.mongodb.net/data?retryWrites=true&w=majority`;
Notice that I have added data before the question mark. This will be the name of the database under which the user collection will be created. Otherwise, MongoDB will call it test by default.
Save the URI as an environment variable SECRET_MONGODB_URI in the .env file (located at the root of the project).
To connect with MongoDB, we will use the mongoose package:
npm i mongoose
We create a file lib/server/db.ts (or db.js if you are using JavaScript) and declare the following function to get the database connection.
// lib/server/db.ts

import mongoose from 'mongoose'
import { SECRET_MONGODB_URI } from '$env/static/private'

export async function connect_to_db() {
	try {
		return await mongoose.connect(SECRET_MONGODB_URI)
	} catch (err) {
		console.log(err)
	}
}
We use this function in the layout server load function. If the connection failed, we show a 500 page.
// +layout.server.ts

import { error } from '@sveltejs/kit'
import { connect_to_db } from '$lib/server/db'

export const load = async (event) => {
	const connection = await connect_to_db()
	if (!connection) throw error(500, 'Database connection failed')
}
User model
Every user in the database will have an email, password and name. Moreover, the email must be unique. We need to create a model reflecting this choice. With mongoose, we first define a schema and then derive a model from it. This is done in a new file lib/server/models.ts as follows.
// lib/server/models.ts

import mongoose from 'mongoose'

const User_Schema = new mongoose.Schema({
	email: { type: String, required: true, unique: true },
	password: { type: String, required: true },
	name: { type: String, required: true },
})

export const User_Model = mongoose.model('User', User_Schema)
Notice that the restraint unique: true in the email field will throw an error when we want to save a user with a duplicate email to the database. But to differentiate this error better from other errors, we will implement this check by hand. The restraint also creates an index for the emails so that users will be faster to find by email. A gotcha is that the validation method validateSync does not return an error when the email is not unique. Hence we will not use it here.
Of course, we will not save the real passwords in the database. We will hash them. A convenient way to do this is via the bcrypt package. Let us install it right away. If you use TypeScript, you will also want to install the types as a dev dependency.
npm i bcrypt
npm i -D @types/bcrypt
Registering users
The registration of users is done in four steps:
- On the server, get the form data (email, password, name) from the register page.
- Validate the data.
- If the data are valid, create a user in the database. Otherwise, define an error message.
- Send the error or the success message back to the register page.
Get the form data
Let us create an action handler for the register page and retrieve the form data. We normalize email and name.
// /register/+page.server.ts

export const actions = {
	default: async (event) => {
		const data = await event.request.formData()

		const email = (data.get('email') as string)?.toLowerCase()?.trim()
		const password = data.get('password') as string
		const name = (data.get('name') as string)?.trim()

		const user = { email, name }

		// TODO: register user
	},
}
Validation
The registration process will be done in a separate file, lib/server/register.ts. First, we add functions to validate our data:
// lib/server/register.ts

import { User_Model } from './models'

const email_regexp = /^[a-z0-9._%+-]+@[a-z0-9.-]+\.[a-z]{2,}$/

export async function verify_email(email: string): Promise<string> {
	if (!email) return 'Email is required.'

	if (!email.match(email_regexp)) return 'Please enter a valid email.'

	const previous_user = await User_Model.findOne({ email })

	if (previous_user) 'There is already an account with this email.'

	return ''
}

function verify_password(password: string): string {
	if (!password) return 'Password is required.'

	if (password.length < 8) return 'Password must be at least 8 characters.'

	// check for symbols etc. if you wish

	return ''
}

export function verify_name(name: string): string {
	if (!name) return 'Name is required.'

	if (name.length <= 1) return 'Name has to be at least 2 characters.'

	return ''
}
Here, we have used mongoose's User_Model.findOne method to find users by their properties. We used it to check that the email is not already taken. Also, we export the functions verify_email and verify_name since we will reuse them later.
Registration
Now we can write the function that actually registers the user in case the validation was successful. With user = new User_Model(...) we can create a new user. And using user.save() we can asynchronously save it to the database. As mentioned before, we hash the password before it lands in the database.
// lib/server/register.ts

export async function register_user(
	email: string,
	password: string,
	name: string,
): Promise<{ error: string }> {
	const email_error = await verify_email(email)
	if (email_error) return { error: email_error }

	const password_error = verify_password(password)
	if (password_error) return { error: password_error }

	const name_error = verify_name(name)
	if (name_error) return { error: name_error }

	const salt_rounds = 10
	const hashed_password = await bcrypt.hash(password, salt_rounds)

	const user = new User_Model({
		email,
		password: hashed_password,
		name,
	})

	try {
		await user.save()
		return { error: '' }
	} catch (err) {
		return { error: err?.toString() as string }
	}
}
This function always returns an object with an error message, which is an empty string if and only if the registration was successful.
Send the result back to the register page
Now we can complete the action handler. In case of an error, we send a response with the status code 400, including the error message. Otherwise, we send a success message. In any case, we send both email and name back because we want to fill the form fields with these so that the user does not have to type them again after the page reloads.
// /register/+page.server.ts

import { register_user } from '$lib/server/register'
import { fail } from '@sveltejs/kit'

export const actions = {
	default: async (event) => {
		// get email, name, password (see above)

		const user = { email, name }

		const { error } = await register_user(email, password, name)

		if (error) {
			return fail(400, { user, error })
		} else {
			const message = 'Registration successful! You can now login.'
			return { user, message }
		}
	},
}
On the register page, we declare the prop containing the action data that we have just defined. It is called form. (In my opinion, this is an unfortunate name choice of SvelteKit, since form is not what we entered into the form, and something like actionData seems to be more appropriate.)
<!-- /register/+page.svelte -->

<script lang="ts">
	export let form
</script>
In the email field, we pass the email from the action data as a value, in case it's present. We use optional chaining and an empty string as a fallback to prevent any errors.
<input
	type="email"
	id="email_input"
	name="email"
	value={form?.user?.email ?? ''}
/>
We do the same with the name field, but of course not with the password for security reasons.
If the registration was not successful, we show the error message. We can add an appropriate error class if we like, but the CSS will not be covered here.
{#if form?.error}
	<p class="error">
		{form.error}
	</p>
{/if}
Otherwise, we show the success message.
{#if form?.message}
	<p class="success">
		{form.message}
	</p>
{/if}
Testing the registration process
It's time to test!
- Try to register with no email. You will get an error.
- Try to register with a non-valid email (but which is still validated by the native input field), such as
test@o.k. You will get an error. - Try to register with a password that is too short.
- Try to register with valid data. You will get a success message.
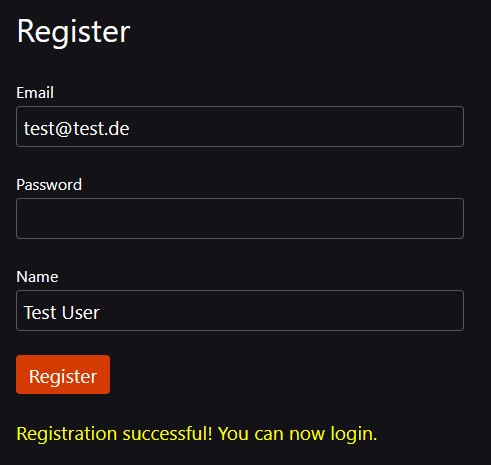
- Also, check your MongoDB Atlas instance, you will see the generated user. It will look something like this:
{
	"_id": { "$oid": "64baf595310b1744be046c78" },
	"email": "test@test.de",
	"password": "$2b$10$ndqltAzcc1McVP0.rwLCnOCPVqZv8hA1N/EB8pofJYvG2wzR0yEuy",
	"name": "Test User",
	"__v": { "$numberInt": "0" }
}
Progressive Enhancement
When submitting the registration form, the page reloads. This is just how POST requests work since the dawn of mankind. But when JavaScript is available, we can improve the user experience and make it more seamless by removing the page reload and letting SvelteKit update the current page to its new state.
This is an instance of progressive enhancement and very easy to do in SvelteKit! Just import the enhance action in the script tag.
<script lang="ts">
	import { enhance } from '$app/forms'
	// ...
</script>
We need to attach this action to the form and are done.
<form method="POST" autocomplete="off" use:enhance>
And while we are at it, let us do the same for the forms on the /login and /account pages.
Login process
The login process can be divided into the following steps.
- On the server, get the form data (email, password) from the login page.
- Validate the data.
- If the data are valid, generate a session cookie. Otherwise, define an error message.
- Send the error or the success message back to the login page.
This is somewhat similar to the registration process. The main difference is the generation of the session cookie.
Get login data
The first step is exactly as before. We create an action handler in the login server file and retrieve the form values.
// /login/+page.server.ts

export const actions = {
	default: async (event) => {
		const data = await event.request.formData()

		const email = (data.get('email') as string)?.toLowerCase()?.trim()
		const password = data.get('password') as string

		// TODO: login user
	},
}
Types
Before we continue, we need to add a type for the users (without the password). We will need it in several places, so let us define a global type. This can be done by adding the following to app.d.ts:
// app.d.ts

declare global {
	type user = {
		id: string
		email: string
		name: string
	}
}
In the same block, let us also add a type just for the ID part of a user. This will be used later to authenticate a user.
type auth = {
	id: string
}
Login validation
Next, we write the function for logging in users. Let's create a new server file for this and add the following function:
// lib/server/login.ts

async function get_user(
	email: string,
	password: string,
): Promise<{ error: string } | user> {
	// TODO
}
This is an async function, either returning a user or an error object.
Let us start by adding some basic validation for the email. We want to reuse the regular expression for emails from before. So it makes sense to create a utils.ts file and define and export it from there. Make sure to import and use it in register.ts.
// lib/server/utils.ts

export const email_regexp = /^[a-z0-9._%+-]+@[a-z0-9.-]+\.[a-z]{2,}$/
Back to our function get_user, we now can validate the email.
if (!email) {
	return { error: 'Email is required.' }
}

if (!email.match(email_regexp)) {
	return { error: 'Please enter a valid email.' }
}
Notice that we cannot reuse the verify_email function from register.ts since there we also checked if the email is already present, which does not apply here.
Next, we need to check if a user exists at all with that email (make sure to import User_Model):
const user = await User_Model.findOne({ email })

if (!user) {
	return { error: 'Email could not be found.' }
}
At this stage, we have a user. Next, we need to check if the password is present and correct. We use bcrypt (make sure to import it) to compare the password from the login form with the hashed password in the database.
if (!password) {
	return { error: 'Password is required.' }
}

const password_is_correct = await bcrypt.compare(password, user.password)

if (!password_is_correct) {
	return { error: 'Password is not correct.' }
}
We are now in the happy case. Next, we want to return the ID of the user. We already saw before that the ID is stored under the key _id and that it is actually an object. (This can also be seen using TypeScript.) We need to use .toString() to convert it to a string to process it further.
const id = user._id.toString()
const name = user.name
return { id, email, name }
Notice that we have returned indeed an object of type user.
We have completed the get_user function. Its result will be used in the login_user function, which we define in the same file.
// lib/server/login.ts

export async function login_user(email: string, password: string) {
	const user = await get_user(email, password)

	if ('error' in user) {
		return { error: user.error }
	}

	// TODO: generate token
}
We have covered the error case and are left to implement the happy case.
Generate a JWT
A JWT (JSON web token) is nothing but an encrypted version of some user data that is used to authenticate users. Imagine this like a concert ticket: you are only allowed to get inside the venue when the ticket is valid. In our case, we will only store the user ID inside the JWT.
The encryption is done via some secret key that must be stored as an environment variable. Generate some random token, let's call it SECRET_JWT_KEY, and add it to the .env file.
To use JWT, we have to install the jsonwebtoken package (and its types):
npm i jsonwebtoken
npm i -D @types/jsonwebtoken
We import the package and use the jwt.sign() method to encrypt the secret. Then we return the generated token (which is a string).
import jwt from 'jsonwebtoken'
import { SECRET_JWT_KEY } from '$env/static/private'

export async function login_user(email: string, password: string) {
	// ...
	// happy case:
	const token = jwt.sign({ id: user.id }, SECRET_JWT_KEY)
	return { token, user }
}
Send the result back to the login page
Using the login_user function, we can now complete the login action handler. In case of an error, we return the error and the email. Otherwise, the function returns a token and a user object, in which case we will set some cookies later. We also return both the email and the user object to the client.
// /login/+page.server.ts

import { fail } from '@sveltejs/kit'
import { login_user } from '$lib/server/login'

export const actions = {
	default: async (event) => {
		// get email, password (as above)

		const user_data = await login_user(email, password)

		if ('error' in user_data) {
			return fail(400, { email, error: user_data.error })
		} else {
			const { token, user } = user_data

			// TODO: set cookies

			return { email, user }
		}
	},
}
On the login page, we can use the returned action data to either show an error or a success message. We also prefill the email field (as on the register page).
<!-- /login/+page.svelte -->
<script lang="ts">
	import { enhance } from '$app/forms'

	export let form
</script>

<h1>Login</h1>

<form method="POST" autocomplete="off" use:enhance>
	<div>
		<label for="email_input">Email</label>
		<input
			type="email"
			id="email_input"
			name="email"
			value={form?.email ?? ''}
		/>
	</div>
	<div>
		<label for="password_input">Password</label>
		<input type="password" id="password_input" name="password" />
	</div>
	<button>Login</button>
</form>

{#if form?.user}
	<p class="success">
		Welcome {form.user.name}! You can now open the dashboard.
	</p>
{/if}

{#if form?.error}
	<p class="error">
		{form.error}
	</p>
{/if}
Protecting routes
So far, we have registered and logged in users. Our goal is to protect the pages /dashboard and /account from non-authenticated users. For this, we need to know, with every request on the server, if a user is authenticated or not. We will do this with cookies and the handle hook.
Cookies
The event object inside of an action handler (or a server load function) includes a cookies object which can be used to easily manage cookies: we can read cookies with event.cookies.get, and we can set them with event.cookies.set.
In our login action handler, we add the following:
// /login/+page.server.ts

export const actions = {
	default: async (event) => {
		// login process (as above)

		event.cookies.set('auth-token', token, {
			httpOnly: true,
			secure: true,
			path: '/',
			maxAge: 60 * 60 * 24,
		})
	},
}
This sets a cookie with the name "auth-token" and the value token, which is our JWT. The options object specifies that the cookie
- cannot be read or changed with client-side JavaScript (
httpOnly) - can only be transmitted via HTTPS (
secure), except onhttp://localhost, wheresecureis false - affects all routes (
path) - lasts one day (
maxAge)
The first two are set by default in SvelteKit, so you can omit them if you want to. Except for the necessary page option, all these options are security measures.
To authenticate users, we write a helper function in a new file (which always has the advantage of better reusability). We extract the auth token (if it is present) and decode it with jwt.verify. If successful, we get the object of type auth containing the user ID. Otherwise, we return undefined.
// lib/server/authenticate.ts

import jwt from 'jsonwebtoken'
import { SECRET_JWT_KEY } from '$env/static/private'
import type { Cookies } from '@sveltejs/kit'

export function authenticate(cookies: Cookies): auth | undefined {
	let token = cookies.get('auth-token')
	if (!token) return undefined
	try {
		const auth = jwt.verify(token, SECRET_JWT_KEY)
		if (!auth) return undefined
		return auth as auth
	} catch {
		return undefined
	}
}
Handle hook
We are now able to protect the routes /dashboard and /account, or more generally (in case we want to add subroutes) all routes that start like that.
We do this inside of the handle hook on the server. This is a function that runs with every server request. The default handle hook just takes the event object and returns await resolve(event). We can intercept its behavior as we like. Check out the excellent article Learn SvelteKit Hooks Through Example by Joy of Code to learn more about hooks in SvelteKit.
If the route is protected and the authentication is not successful (using the authenticate function from before), we redirect the user to the login page. Otherwise, we implement the default behavior.
// hooks.server.ts

import { authenticate } from '$lib/server/authenticate'
import { redirect } from '@sveltejs/kit'

export const handle = async ({ event, resolve }) => {
	const is_protected =
		event.url.pathname.startsWith('/dashboard') ||
		event.url.pathname.startsWith('/account')

	const auth = authenticate(event.cookies)

	if (is_protected && !auth) {
		throw redirect(307, '/login')
	}

	const response = await resolve(event)
	return response
}
However, you will notice that the dashboard can be opened nevertheless. This is because, right now, no server request is necessary to open that page. The solution is quite simple: create an empty /dashboard/+page.server.ts file, optionally with a comment about why you have created it.
We do the same with the account page. However, we will add logic to its server file later.
Now, these pages can only be accessed after a successful login. Test it! To simulate a logout, you can - for the time being - just delete the cookie in the developer tools. Then you cannot access the pages anymore.
Show login status
On the dashboard and the account page, we want to display the name and email of the user. But how do we get this data?
Well, when we set the auth-token cookie to save the JWT, we can do the same for name and email. We want to use the same cookie options, so it makes sense to add this as an object to our utils.ts file.
// lib/server/utils.ts

const one_day = 60 * 60 * 24

export const cookie_options = {
	httpOnly: true,
	secure: true,
	sameSite: 'strict',
	path: '/',
	maxAge: one_day,
} as const
The as const is necessary to make TypeScript happy in the following.
Import this object in the server file for the login page and replace the hard-coded cookie options object with it when defining the auth-token cookie. Define cookies for email and name in the same way.
// /login/+page.server.ts

event.cookies.set('auth-token', token, cookie_options)
event.cookies.set('email', user.email, cookie_options)
event.cookies.set('name', user.name, cookie_options)
We read these cookies in the layout server load (where we already established the database connection) and return them as page data. For non-authenticated users, we choose empty strings.
// +layout.server.ts

export const load = async (event) => {
	// ...

	const name = event.cookies.get('name') ?? ''
	const email = event.cookies.get('email') ?? ''

	return { name, email }
}
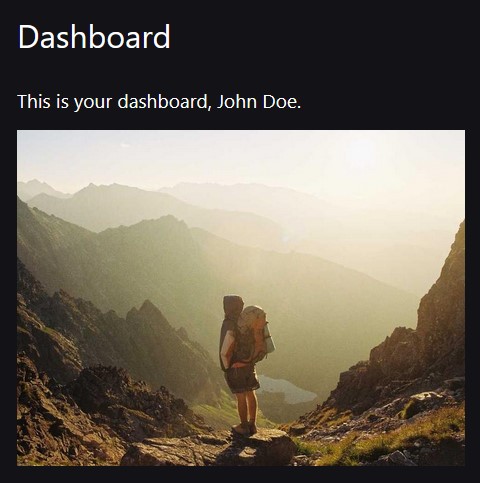
The advantage of doing this in the layout is that these data are available on every page. In particular, on the dashboard, we can display the user name as follows.
<!-- /dashboard/+page.svelte -->

<script lang="ts">
	export let data
</script>

<h1>Dashboard</h1>

<p>This is your dashboard, {data.name}.</p>
It might look like so:
Improve navigation
In the layout itself, we can also check if the user is authenticated and pass the corresponding boolean authenticated as a prop to the navigation component.
<!-- +layout.svelte -->

<script lang="ts">
	import Nav from '$lib/components/Nav.svelte'
	export let data
</script>

<Nav authenticated={!!data.name && !!data.email} />
We can use this to hide the pages from the navigation which are not available to non-authenticated users anyway. Also, the pages which are irrelevant to authenticated users will not be shown. To make this systematic, we use a list of links, each having a protected flag.
<!-- lib/components/Nav.svelte -->

<script lang="ts">
	export let authenticated = false

	type link = {
		path: string
		text: string
		protected: boolean
	}

	const links: link[] = [
		{
			path: '/',
			text: 'Home',
			protected: false,
		},
		{
			path: '/dashboard',
			text: 'Dashboard',
			protected: true,
		},
		{
			path: '/account',
			text: 'Account',
			protected: true,
		},
		{
			path: '/register',
			text: 'Register',
			protected: false,
		},
		{
			path: '/login',
			text: 'Login',
			protected: false,
		},
	]
</script>

<nav>
	<ul>
		{#each links as link}
			{#if link.path === '/' || authenticated === link.protected}
				<li>
					<a href={link.path}>
						{link.text}
					</a>
				</li>
			{/if}
		{/each}
	</ul>
</nav>
This means that authenticated users see /, /dashboard, /account, whereas non-authenticated users see /, /login, /register.
Of course, this is just a client-side solution that should only be used in conjunction with the server-side protection we implemented before in the handle hook. Even non-authenticated users can just open the URL {domain}/dashboard in the browser. The handle hook is what takes care of redirecting them to the login page.
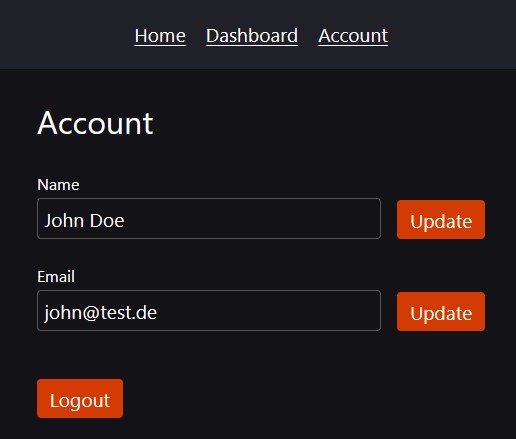
Account page
On the account page, we display the name of the user (using page data as explained before) and also offer the option to change the name. The same for email. This means that on this page we have two forms with corresponding action handlers, which makes it necessary to name the handlers.
Update name
I will only explain the update of the name since the one for email works the same. The form looks as follows.
<!-- /account/+page.svelte -->

<script lang="ts">
	import { enhance } from '$app/forms'

	export let form
	export let data
</script>

<h1>Account</h1>

<form action="?/name" method="POST" autocomplete="off" use:enhance>
	<div>
		<label for="name_input">Name</label>
		<input type="text" id="name_input" name="name" value={data.name} />
	</div>
	<button>Update</button>
</form>
In the corresponding server file, we create a handler for the action called name. We create a function change_name in lib/server/account.ts (to be defined in a moment) and use it here. When the update is successful, we update the name cookie as well and send a success message.
// /account/+page.server.ts

import { fail } from '@sveltejs/kit'
import { cookie_options } from '$lib/server/utils'
import { change_name } from '$lib/server/account'

export const actions = {
	name: async (event) => {
		const data = await event.request.formData()
		const name = (data.get('name') as string)?.trim()

		const update = await change_name(event.cookies, name)

		if ('error' in update) {
			return fail(400, { error: update.error })
		}

		event.cookies.set('name', name, cookie_options)

		const message = `Your new name is ${name}.`

		return { name, message }
	},
}
I will not explain how to display error and success messages on the account page, since this is analogous to what we did on the login and register pages.
Let us instead look at the change_name function, which of course has to interact with our database, specifically by using the User_Model model. It takes the cookies as an argument to extract the JWT and hence the user ID. If some error occurs, we return it. To verify the name, we reuse the function verify_name that we already implemented for the registration process. If a user with the ID can be found, we simply update the name by writing user.name = name followed by await user.save().
// lib/server/account.ts

import type { Cookies } from '@sveltejs/kit'
import { User_Model } from './models'
import { authenticate } from './authenticate'
import { verify_name } from './register'

export async function change_name(
	cookies: Cookies,
	name: string,
): Promise<{ error: string } | { name: string }> {
	const auth = authenticate(cookies)

	if (!auth) {
		return { error: 'You are not authorized.' }
	}

	const { id } = auth

	const name_error = verify_name(name)

	if (name_error) {
		return { error: name_error }
	}

	const user = await User_Model.findOne({ _id: id })

	if (!user) {
		return { error: 'User could not be found' }
	}

	if (user.name === name) {
		return { error: 'You already have this name.' }
	}

	user.name = name

	try {
		await user.save()
		return { name }
	} catch (err) {
		return { error: err?.toString() as string }
	}
}
After updating the name and email, the layout server load runs again, which causes the page data containing the name and email to update as well. As a consequence, the dashboard will have the updated name.
Logout
We need to give the users an option to log out. First, we add a corresponding button to the account page. We wrap that button inside of a form to make use of form actions as before (which also work when JavaScript is disabled).
<!-- /account/+page.svelte -->

<form action="/logout" method="POST">
	<button>Logout</button>
</form>
This sends a POST request to the /logout page. Actually, there is no page, just a corresponding server file (apparently, this is allowed). Here, we delete all cookies and redirect the user to the home page.
// /logout/+page.server.ts

import { redirect } from '@sveltejs/kit'

export const actions = {
	default: async (event) => {
		event.cookies.delete('auth-token')
		event.cookies.delete('email')
		event.cookies.delete('name')
		throw redirect(301, '/')
	},
}
And that's it!
Conclusion
We have learned how to build user authentication from scratch in SvelteKit. What seems to be very complicated, maybe even daunting at first sight turns out to be rather simple after you have done it once. The whole process can be divided into several small steps, each one being quite simple and easy to grasp. At least, this is my personal experience from this project.
I have heard several times that implementing user authentication by hand in a proper and secure way is very hard. Developers are discouraged from implementing this without external libraries. I am not sure why. I would only recommend libraries when you want to include multiple OAuth providers (Google, GitHub, Discord, etc.). Also, implementing it by hand is a very valuable learning experience.
If you liked this blog post, feel free to smash that like button and share the post on Twitter.